
After spotting the Instructable that got me started on on this project, I remembered that I had a piece of 12mm MDF that I’d picked up at B&Q. They had an off-cuts section and for a couple of pounds they sold me a piece that was 1220mm x 400mm.
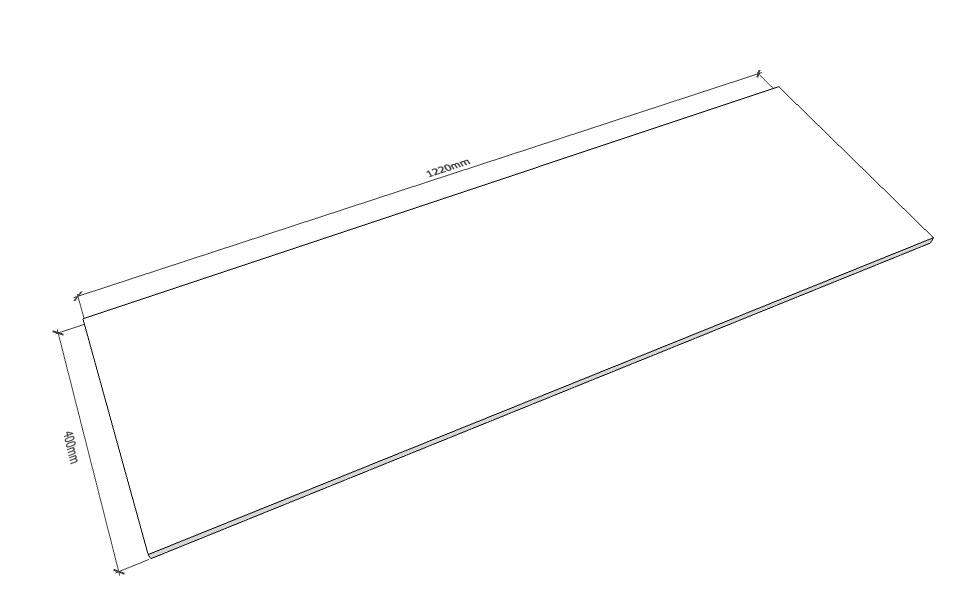
I ripped the board into two pieces with my skill saw, so that one was 800mm long.

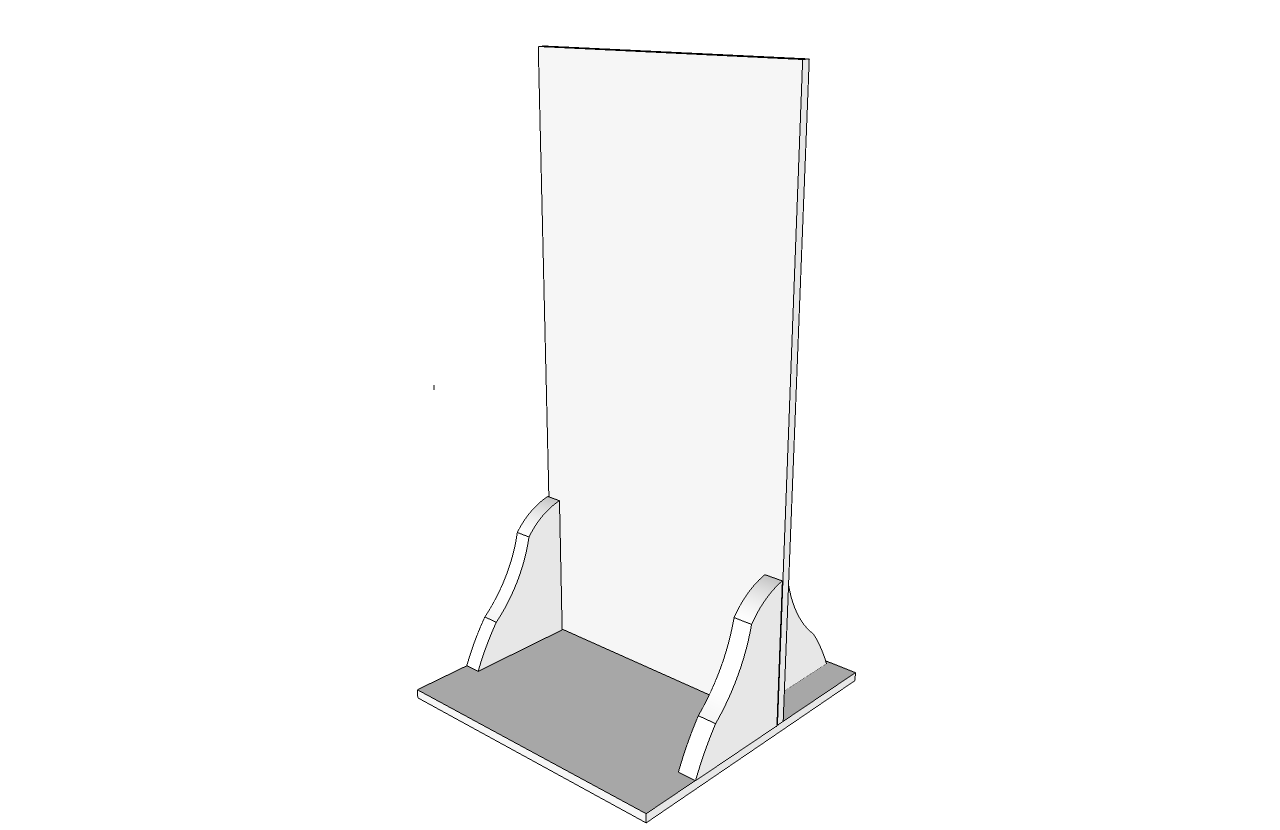
The intention was to make a frame like the one below. The longer piece would be the vertical one, which would rest on the shorter one which was the base. I knew the 12mm MDF wasn’t thick enough to hold the weight of the projector at the top.
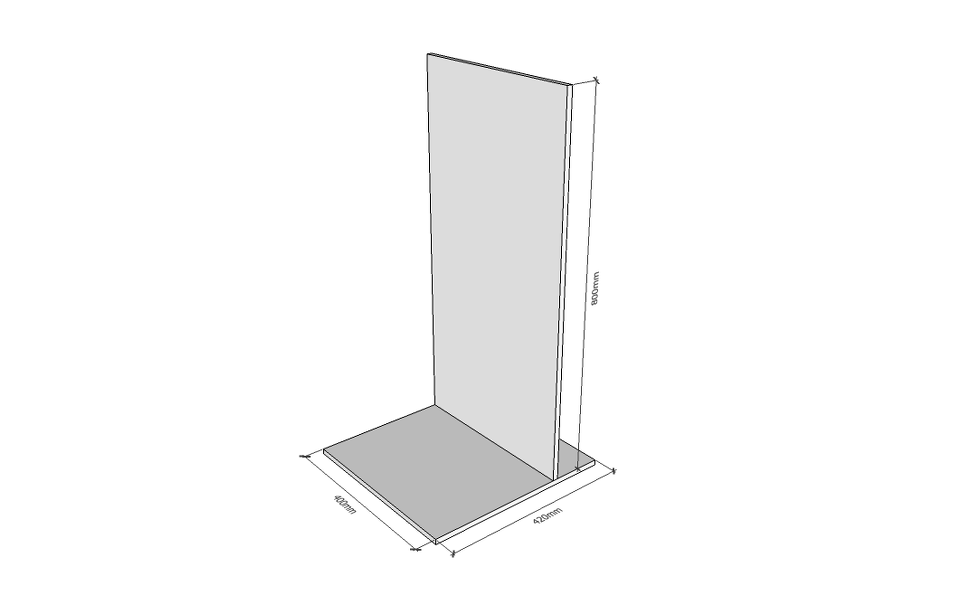
A piece of 25mm stock was enough to add the strength down each side, which was glued and bolted to the MDF. I didn’t want to screw the MDF to the supports because I wasn’t sure if it would hold and I felt like I needed to spread the load, to prevent the fibres coming apart.
The 25mm support was set in from the edges of the board by 18mm, which would give me space to drill through and screw in brackets. Using longer screws, I was confident that these joints would hold.
The end result was a bit industrial and I was quite happy with that.
I had taken down wooden shelving in the kids bedrooms when we re-decorated them, so instead of donating them to the rubbish tip I’d put them to one side incase they could be reused.
The shelves are the ones from the value range and are made up of the shelf and some wavy brackets.
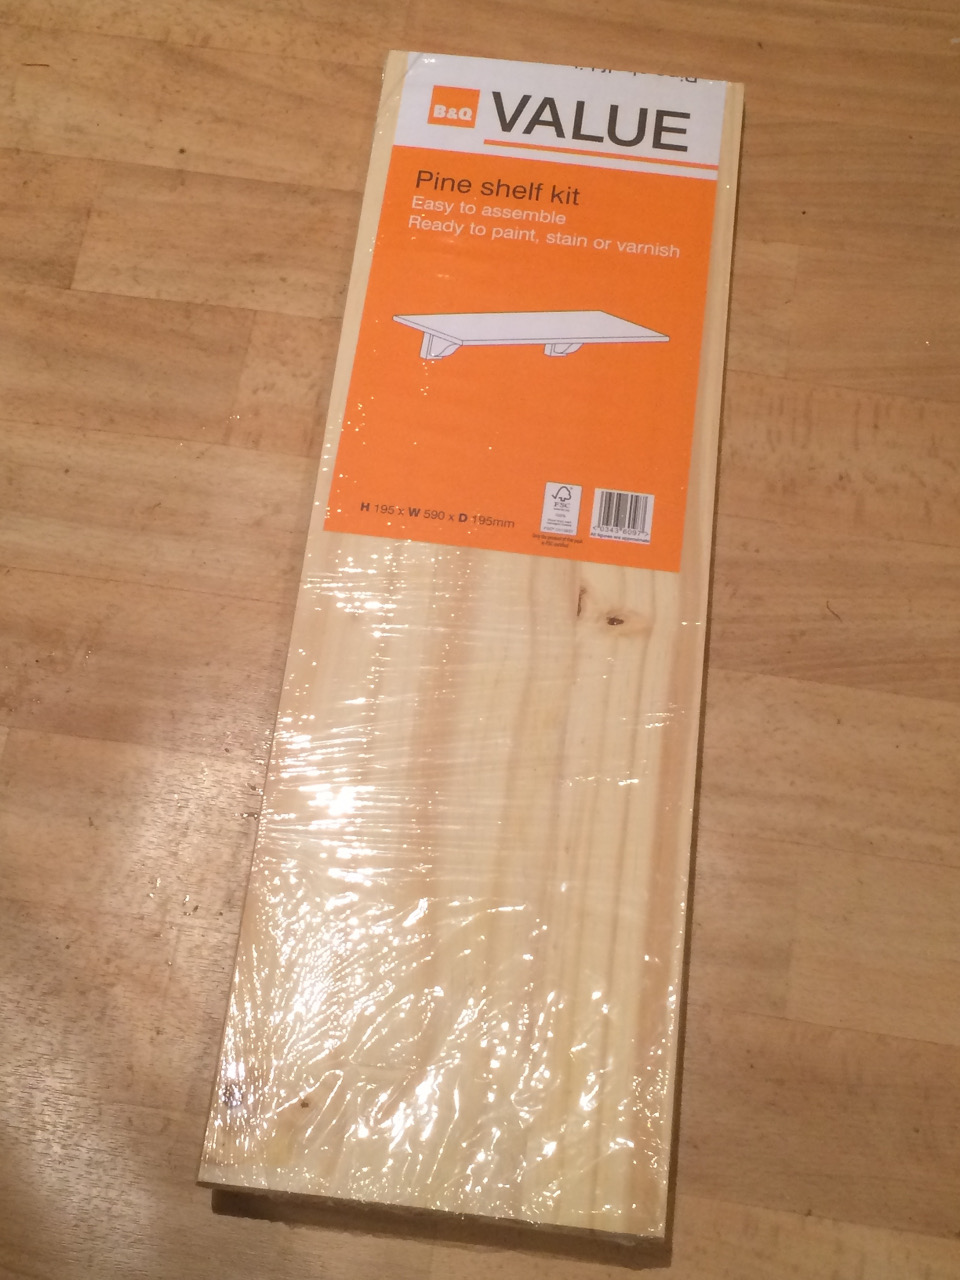
I could have made these right angled supports out of anything but as this was on hand it seems a shame to waste it.
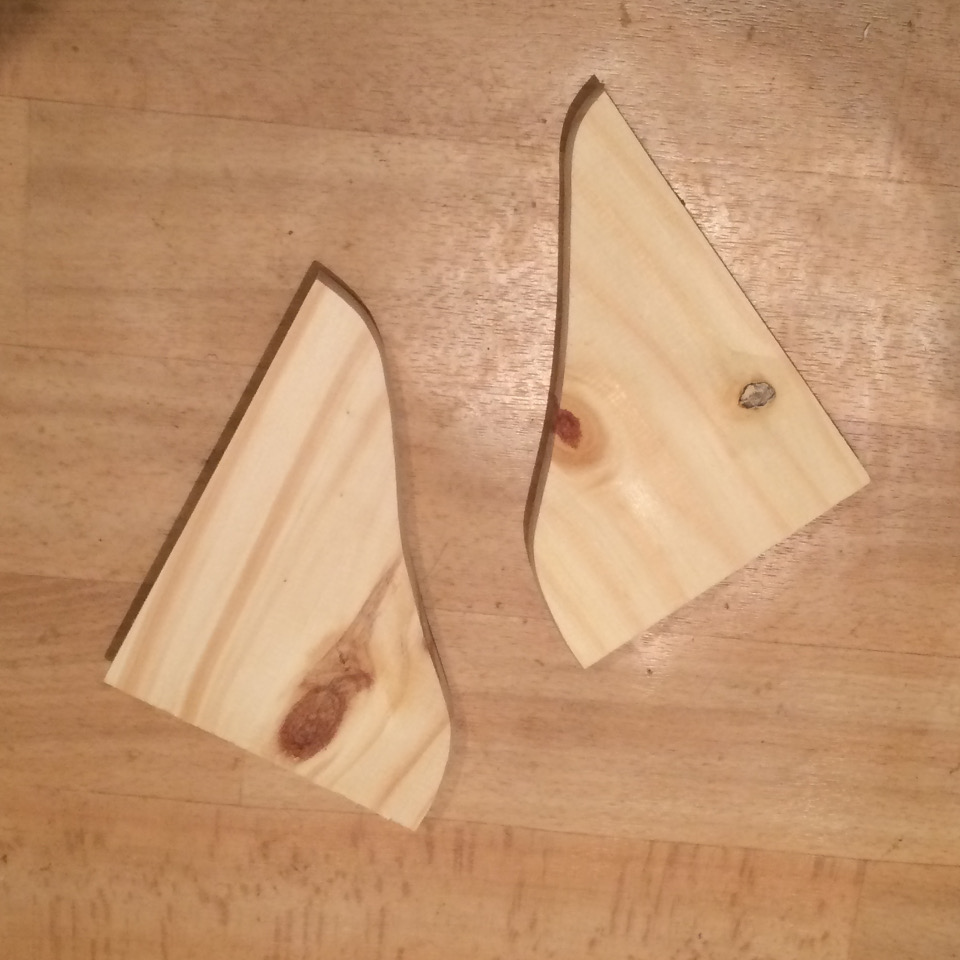
I had loads of these on hand and used them fill the right angles between the upright and base boards in the frame.
I drilled and countersunk the MDF and pre-drilled the brackets. Then I glued the brackets in place and when that had set, screwed them in place.
I ended up using one shelf and 6 brackets in total in the whole build, 4 for the frame and 2 in the shelf, but more on that another time.
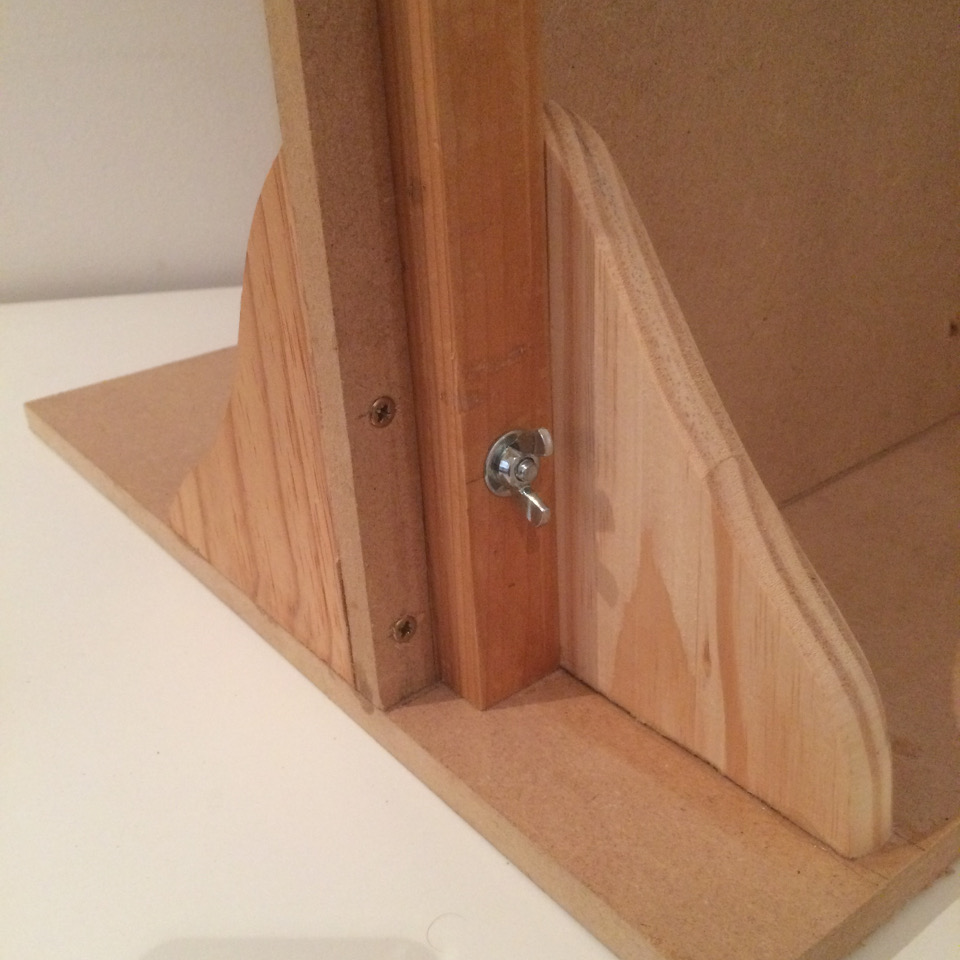
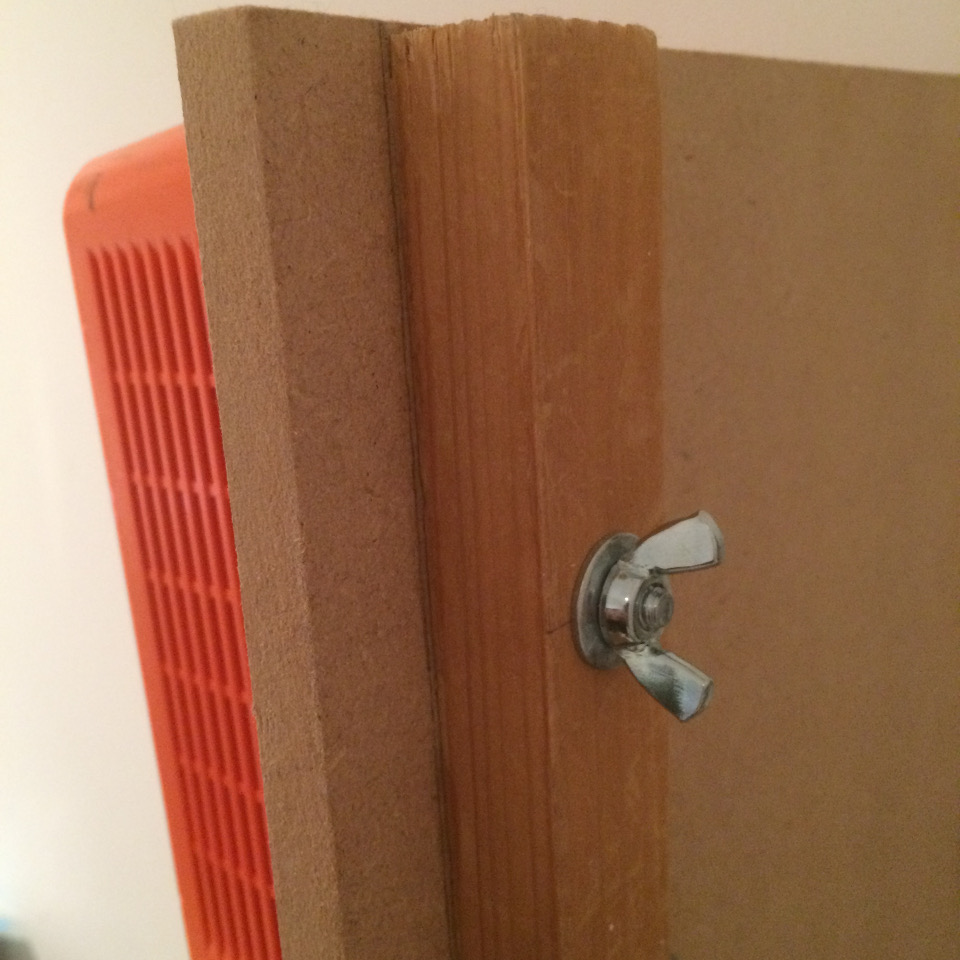
I need to go back at some point and replace these wing nuts with something more permanent. I bought a pack of them for use with the shelf, which I’ll talk about in a later page.
A lock nut should do the trick.
So now we have the basic frame on which to mount the projector.
Next time, I’ll explain how the projector was altered & how it was fixed to the frame.
